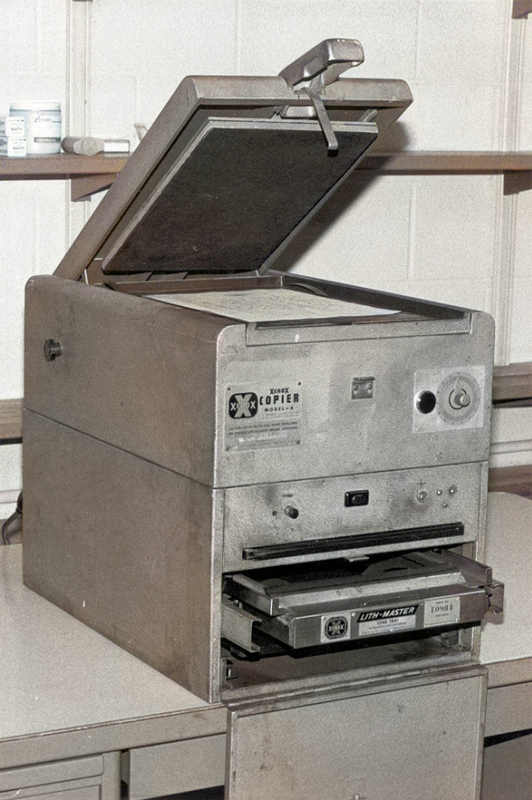
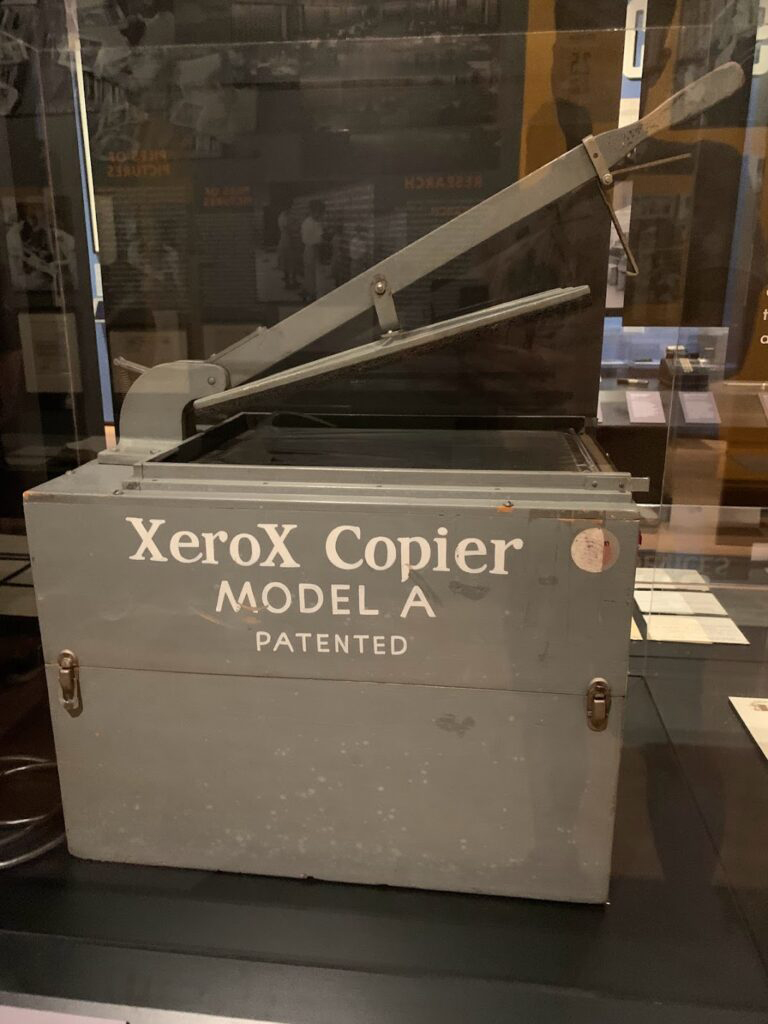
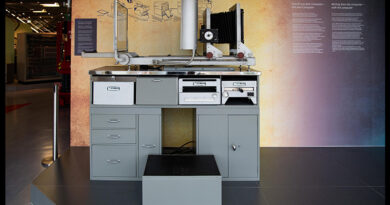
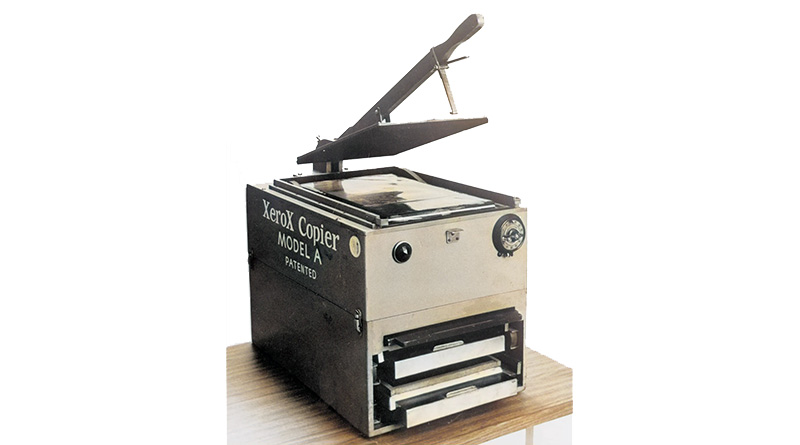
Pre-Xerox 914

Model A copier

In 1949, the Haloid Company produced its first copying machine. It was called the Model A. During development it was simply called the XeroX Box, and was nicknamed 'The Ox Box' An early version of this had a wooden box as a frame, but when it was commercialized it had a metal box. It was cumbersome to use, and not really a marketing success, but it was the first office product. Smithsonian Magazine says it was "a messy 39-step process"!


Xerox Model A explained

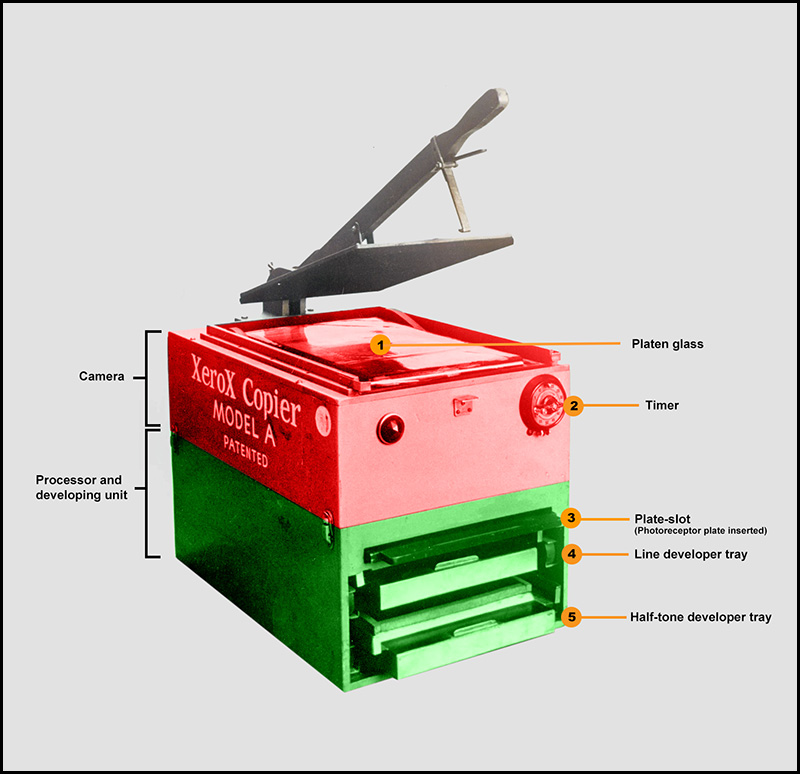
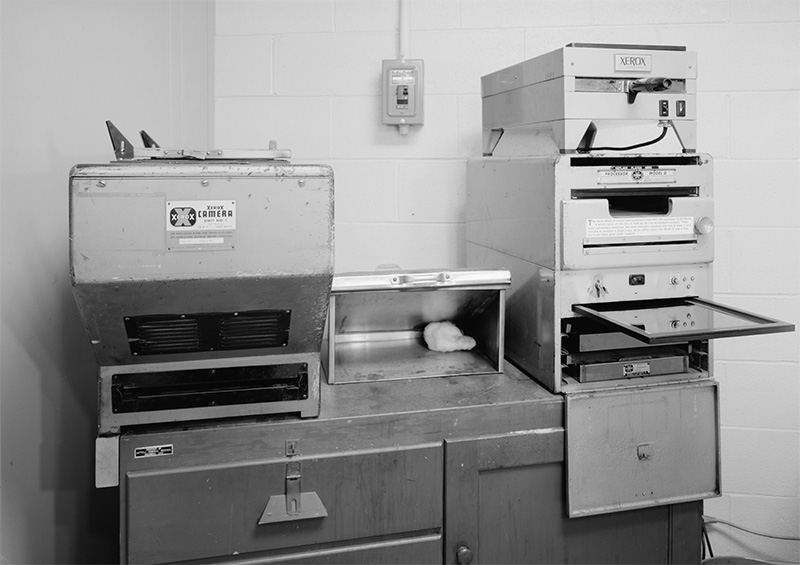
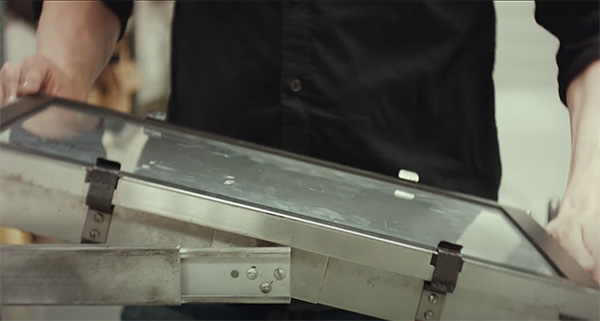
The Model A copier, showing how it was two separate units, stacked and held in place by 4 clasps. Marked in Red, there's the camera. It is topped by the Platen Glass (1) and Platen cover. The Platen Cover serves to both hold the original document flat, and to exclude light. In Green, there's the combined Processor and Developer unit. From the bottom - up is the half-tone developer tray (5), the line developer tray (4), and the plate-slot (3). (this is shown with a plate in place, complete with Light-Shield)

The camera comprised an exposure lamp, which floodlit the underside of the Platen Glass. The reflected image passed downwards, through a central lens, and was beamed directly onto the surface of the charged Photoreceptor Plate, sitting in the top slot of the Developer unit, to produce a negative latent-image. The length of the exposure was adjustable, using the Timer (2), shown.

Probably the plates were stored in a separate, heated stacker, virtually identical to the one used with the later models. So, a plate is extracted from storage and slid into the top slot on the Processor Unit (3), whilst holding down the big button (top left.) Pressing the button energises the DC Charging Unit. The Charging Bar is then passed over the plate, using a knob on the right-hand side, and it becomes ionically charged and ready for exposure, as detailed above.

A row of needles, embedded in an insulating bar, are fed with a high voltage. If the voltage is DC, a charge will be imparted to any nearby insulating material. If the voltage is AC, then any latent charge will be neutralised. Also, a great deal of Ozone will be produced. (hence the accompanying smell.)

Photoreceptor plate
Photoreceptor plate with a Developed image

So, the Charged plate has been Exposed and now contains an invisible 'latent' image of the original document. To hold the 'latent' image in place the Light Shield is slid over the plate, and the assembly extracted from the slot for Developing. The required Development Tray (usually the top one) (4) is slid out on it's side rails, and the plate, covered by the Light-Shield, is turned over and clipped to the open top of the tray. The Light Shield is then removed and the plate fully pressed down to provide a light and developer seal. The Developer Tray contains a measured amount of 'Glass Bead Carrier' coated in Toner Powder. The two, combined together, constitute the Developer. The Carrier will have been pre-agitated to endow it with a Tribo-Electric Charge (static) in order to attract the Toner Powder and coat the Glass Beads. At this time the Toner was a mixture of a finely ground thermoplastic and carbon black (soot).

Photoreceptor plate cascades developer
Developer cascaded smoothly over the surface of the Exposed plate

Next came the most critical part of the operation, which required the utmost practice and skill - Cascade Developing! Using a handle on the side of the Developer Tray, the tray was tumbled, in it's central gimblels, so that the Developer cascaded smoothly over the surface of the Exposed plate. Six cascades was determined to be the optimum requirement, before the tray was re-latched in the horizontal position. Then, and this was very important, to detach any beads which may have adhered to the plate, and would ruin transfer, the Dev-tray was tapped, smartly, on the side, before unlatching the plate and examining the 'negative' image on the plate. Now came a unique feature of all the Flat-Plate machines - the image could be edited! Using soft cloth or cotton (later rayon) wool, dirty background and other unwanted marks could be removed prior to transfer.

Squeegee
Squeegee

On all the later models, Transfer is produced electrically. On the Model A this was not possible. For tranferring the latent image to the paper, you must use a Squeegee, or soft textile pad, to induce a static charge in the paper.

So - a sheet of paper was 'rolled' carefully, onto the developed negative image, taking care not to smudge it. Then the back of the paper was stroked with the squeegee or pad, such that a static-charge was induced in the paper, Transferring about a third of the image onto the paper. (A good operator could produce 4 usable prints from a single operation.)

Taking careful hold of one corner of the paper, the copy was rolled off the plate (once more taking care not to smudge) and placed into the Heat Fuser.

It was then up to the operator's judgement to leave it in the Fuser just long enough to fix the image, without scorching the paper.

Heat fuser
Heat fuser

Thanks to Stuart Yearsley for providing all the information.

IMAGES

Model B, C and D

After the Model A copier was launched, further developed versions of the Model A were also produced. These were unofficially called Model B and Model C. Finally, the Model D was introduced in 1951.

Between the Model A copier and the Model D Processor came the model B (an improved but never marketed version of the Model A) Unfortunately, theres no picture of the Model B.

Model D

The Model D Copier was produced in late 1951, the successor to the Model A which came off the line in 1949 as the first xerographix product. These where rudimentary machines that where manually operated and took at least 1 to 2 minutes to produce a single copy. As an office copier, the Model D was a flop, but it did make good offset masters.

Source: https://www.loc.gov/pictures/item/oh1541.photos.126771p/

If you have pictures or information of the Model B or Model C copier, please leave a reply in the form below, or send an email to xeroxnostalgia@outlook.com

Subscribe
Notify of
guest

This site uses Akismet to reduce spam. Learn how your comment data is processed.

0 Comments
Inline Feedbacks
View all comments
0
Would love your thoughts, please comment.x
()
x